Zion - Bryce Canyon National Parks Itinerary and Travel Tips
Here are the “can’t miss” highlights of a visit to the two southwestern-most of Utah’s Big 5 National Parks – Zion and Bryce Canyon. Let’s start with transportation options.
Option A is a quick one-hour flight from Phoenix to St. George Utah on American Airlines for $150-200 round trip (non-stop, but Covid-era high pricing).

The magic of Zion National Park from above - a major side benefit of flying vs. driving.
Pro tip: If you’re planning to fill a National Parks passport with visits to many parks, get acquainted with Allegiant airlines. This is a regional hopper that flies non-stop to many of the National Parks at a steep discount. The two tradeoffs are limited flights (usually only two days a week to/from a particular location) and fights out of a less mainstream airport that might not be as conveniently located for you. I always check Allegiant options for the convenience first, and the savings second. When I last visited Zion/Bryce Allegiant was flying to St. George. Since then, they’ve stopped flying here so you’ll have to rely on American, Delta, or United for flights.
Option B is an easy 5.5 hour drive from Phoenix. With this option, you won’t have to rent a car upon arrival in St. George. For this itinerary, it’s a coin toss on which is the better transportation option and purely just your preference.

A furry friend on the Zion Riverwalk
If you have the time, plan on 5+ days to fully experience Zion and its nearby sister, Bryce Canyon National Park.
Day 1 to arrive and do the Zion National Park shuttle tour/Riverwalk.
Day 2 to hike the Narrows (weather permitting) or alternatively, hike the eastern side of Zion National Park.
Day 3 to make your way to Bryce Canyon with a stop to explore gorgeous Red Canyon state park.
Day 4 to visit Bryce Canyon.
Day 5 to visit Grand Escalante National Monument Grosvenor Arch and (sadly) head home.
You could easily spend a week and still not experience everything in this area.

Views along the Zion Riverwalk
Day 1: Zion Riverwalk. The way to get the most of your experience at the park is through use of the free shuttle system along the Riverwalk. It’s more of a project to ride the shuttle during Covid with passenger limitations due to social distancing requirements, but it’s still the best way to see the park and a gift that the park remains open at all.
In the Covid era, you must reserve a shuttle ticket in advance. Recognize that each bus is limited to just 33 passengers so much patience is required waiting six feet apart in queue while several full buses pass you by. Plan to walk between stops or wait up to 45 minutes for the next available shuttle when you venture off the bus to explore.

Day 2: Six miles deep in the Canyon, at the end of Zion National Park’s shuttle route, is the Temple of Sinawava, named for the coyote god of the Pauite Indians.
It’s here that the park’s real adventures begin. The Narrows is a very unique and somewhat challenging hike literally in the Virgin River. Often just 20 feet wide with canyon walls towering up to 2000 feet straight up along either side of the river, it feels VERY narrow. It’s fun and safe as long as it hasn’t been raining recently. You can walk for a few minutes and turn around or make it an all-day adventure to Big Spring and back (10 miles).
You WILL get wet from the moment you start the hike as you wade into the water. In colder spring/fall/winter weather consider renting gear to keep you warmer and dryer while you hike. Even so, wear clothes that you don’t mind trashing.
Pro tip: Order a dry bag on Amazon before you go. This will keep your phone, credit cards and car keys dry plus save you money versus renting. The dry bag I bought came with a 5 Liter dry bag and a second lanyard style pouch dry bag that was perfect for my phone. You can even take photos through the lanyard-style dry bag without opening it!
I did this hike with my tween-aged sons a few years ago during the summer. At points along the way I had to hold my backpack overhead as the river got as high as my waist. It’s dirty, muddy water so definitely don’t wear anything white unless you want it to become some sort of natural tie-dyed souvenir afterward!

Checkerboard Mesa with its interesting vertical and horizontal cracks that give this spot its name.
Day 3: Depart Zion in the morning and head toward to Bryce Canyon. There are a few interesting overlooks on the eastern edge of the park (such as Checkerboard Mesa), which has a different vibe. If you feel like a hike, the East Rim trail is considered one of the best in Utah and will open you up to different scenery than the Riverwalk.
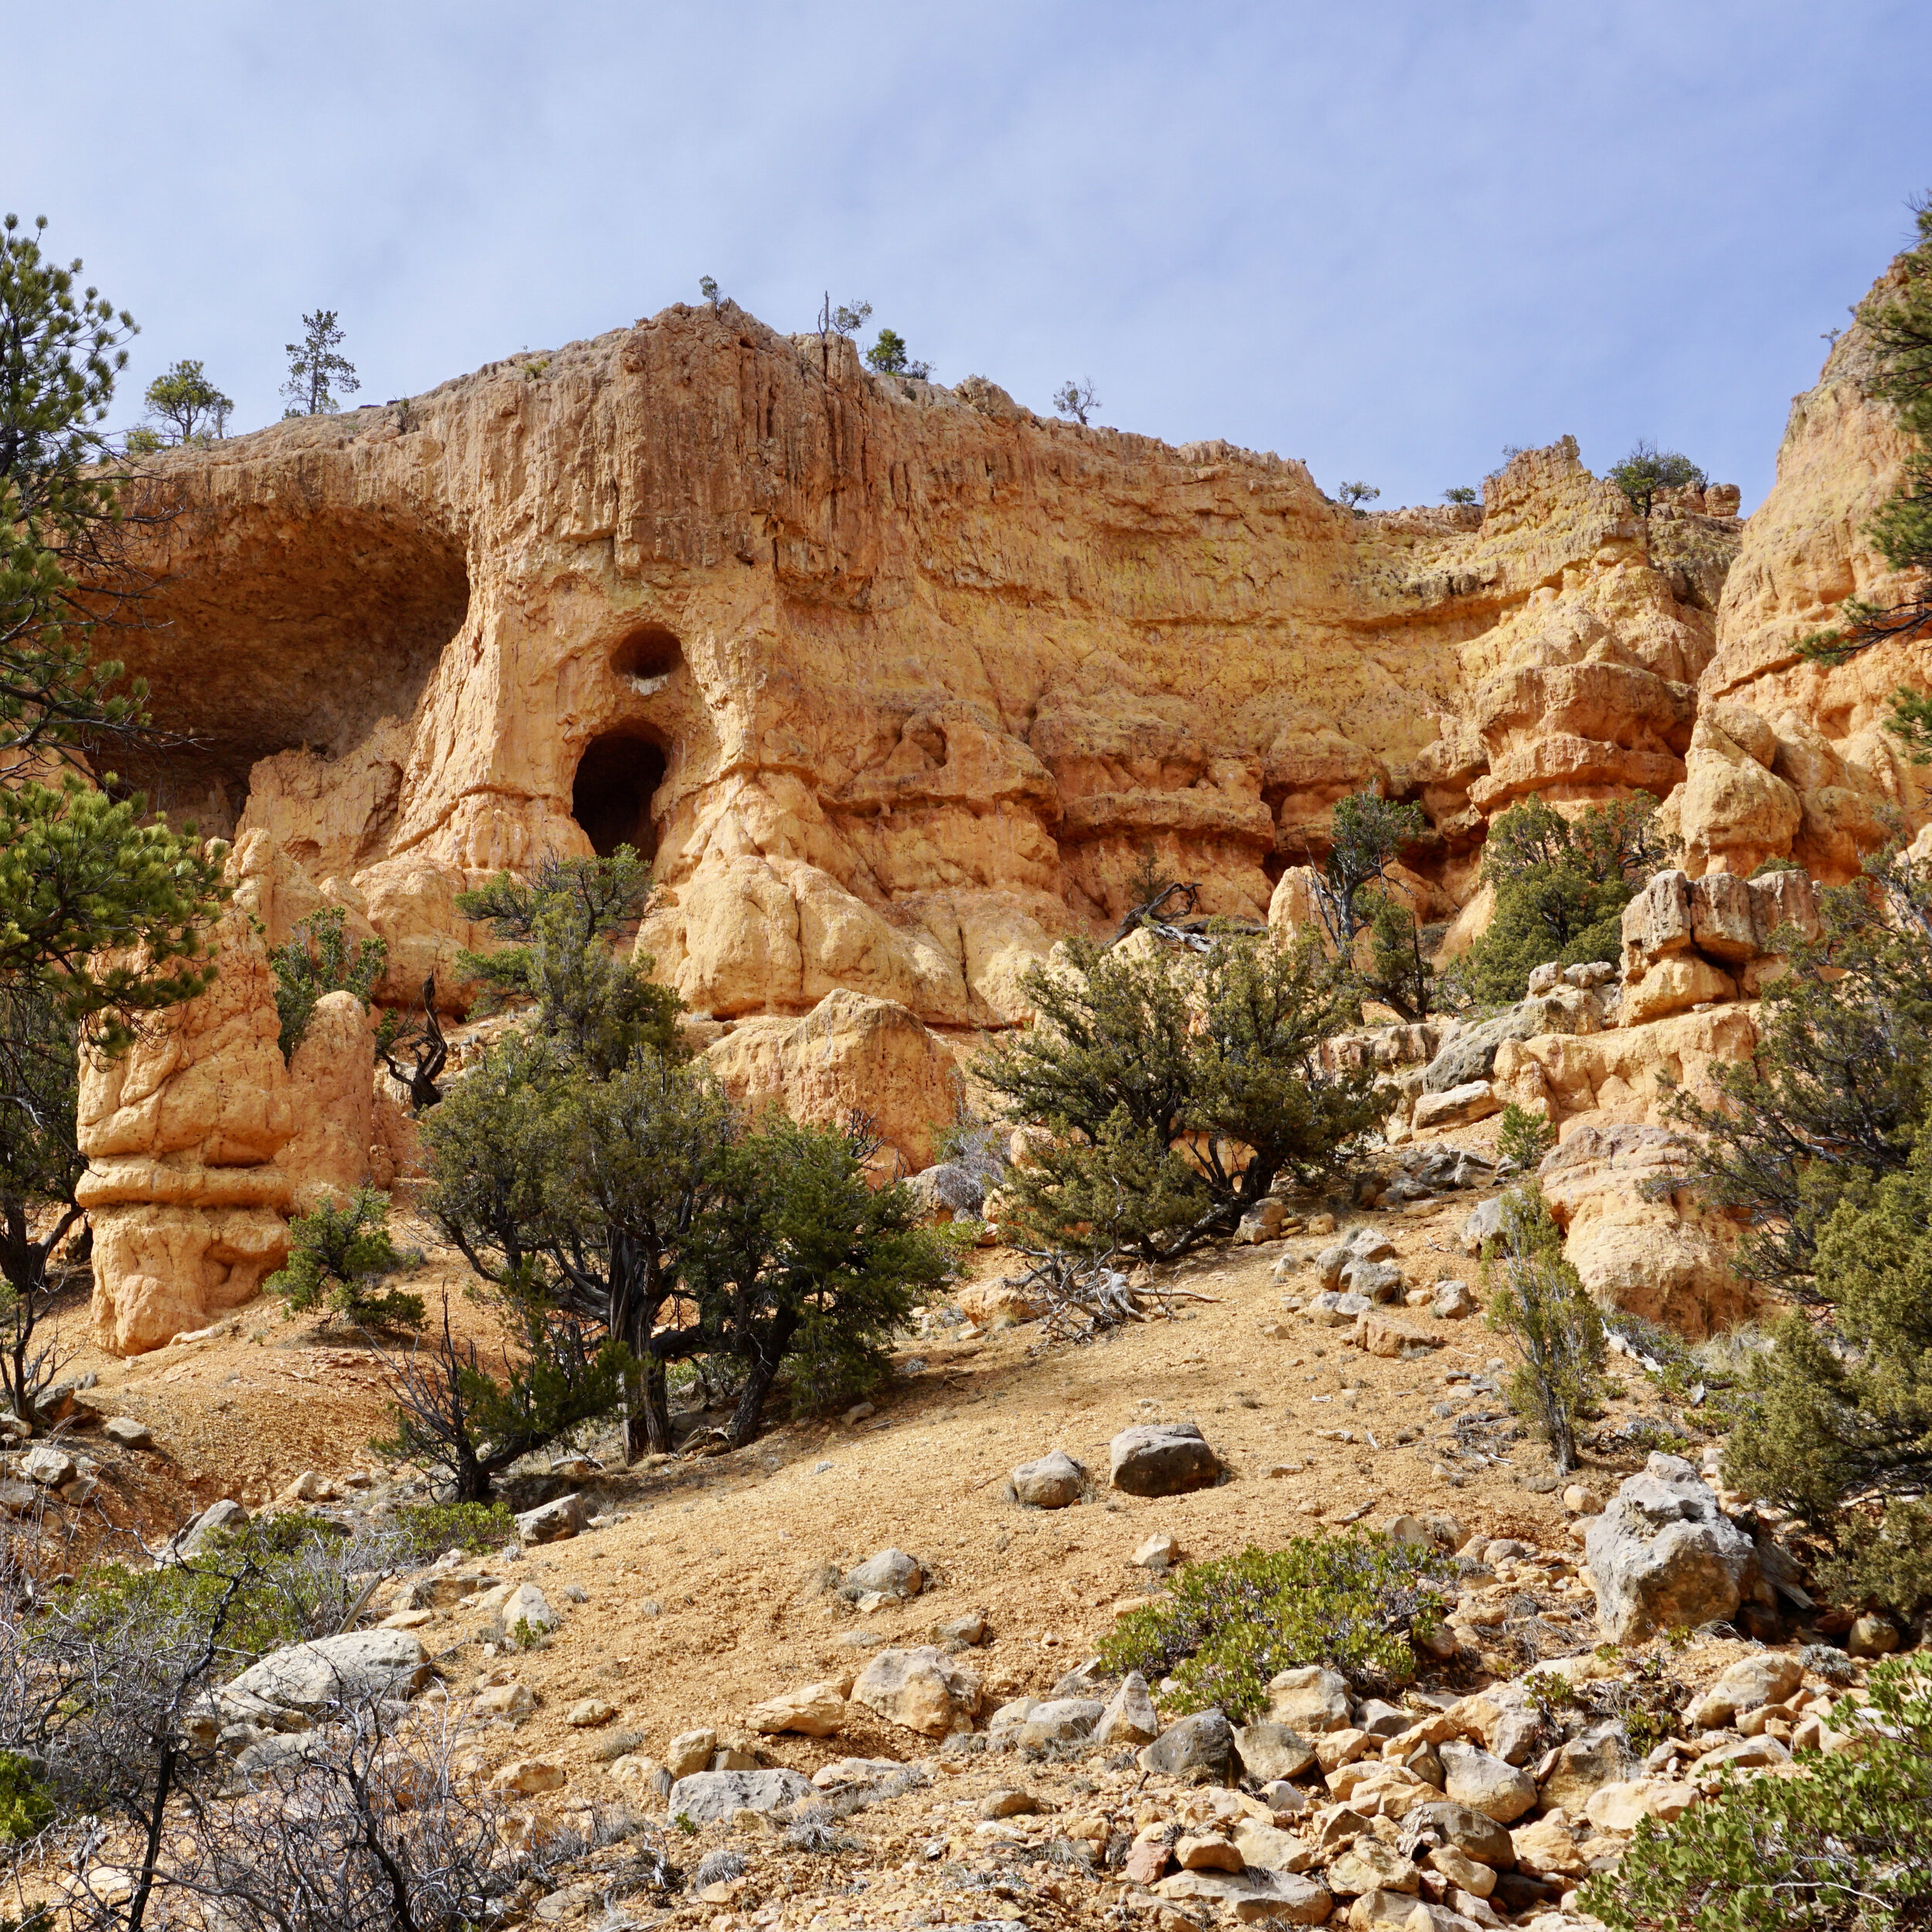
Red Canyon - a “must see” between Zion and Bryce Canyon
It’s hard to leave Zion but be sure to leave time to explore Red Canyon in the Dixie National Forest as this is yet another “must-see” stop. It’s literally on the road to Bryce which is just over an hour’s drive from the eastern edge of Zion National Park.
I love the contrast of the towering green Ponderosa Pine and scrubby Juniper trees with the vermillion-colored rocks at this park. Toss some snow in the mix and you’ve landed on a postcard-perfect scene that will fill any nature-lover’s heart with joy.
Red Canyon is open all year and is perfect for exploring even during the winter months where access at the nearby National Parks is limited. I spent several hours wandering the Birds Eye and Losee Canyon trails, getting up close and personal with some of these beautiful rock formations.
Day 4: Welcome to Bryce Canyon, one of my favorite National Parks! It’s actually not a canyon at all but a series of small amphitheaters. The most stunning and unique feature is its hoodoos, the oddly shaped natural formations created by frost and stream erosion of the soft sedimentary rock. Nowhere else in the world showcases this many hoodoos!

Bryce Canyon hoodoos
This stunning natural wonder is made possible because a much harder dolomite mineral caps the top of the hoodoos which protects the softer siltstone and mudstone below allowing it to erode over time to create these unusual formations without them collapsing.
The top rim of the park sits at about 8000 feet, so there’s definitely a beautiful snow cover throughout winter until early Spring. If you visit before mid-April, your senses will be delighted by pristine white snow reflecting off the red, yellow and beige/white hoodoos. That time of year you’ll be restricted to views along the rim trail as entry down into the valley the hoodoos call home is icy and therefore closed to hikers.
In my opinion, the best option is to visit twice to get the full experience – once in warm weather and once in winter weather. Most recently I’ve done the winter experience - totally worth it.

Snow-capped Bryce Point
This section of Bryce Canyon is known for its many unique natural windows and arches. Check out the view from Bryce Point.
I love this area not only for the mesmerizing collection of “windows” but also because it’s a completely different look than the reddish hoodoos that make up most of the park.
The white limestone features shown here are of the 50 million year old Claron Formation. Unbelievably, they are much younger than the red rocks below and surrounding them throughout the rest of the park.

Natural Bridge
Last but not least, Natural Bridge is undoubtedly one of my favorite spots at Bryce Canyon. It’s at the southern end of the rim trail and totally worth the drive and short hike to take in its grandeur and beauty.
This natural arch stands 85 feet tall and is 50 feet wide. Like everything in this area, it was formed by millions of years of slow and steady erosion.
I especially love how the bridge stands out with the surrounding area blanketed in powdery white snow.
Day 5: Time to drag yourself away from Bryce and visit nearby Grosvenor Arch before you head home.
Located about an hour’s drive from Bryce Canon, across a fair bit of bumpy, unpaved terrain, the unique double arch can be found in the northwest corner of Grand Escalante National Monument .
The largest arch is about 100 feet wide and the entire structure towers 150 into the sky. While the view from any angle is fantastic, it's especially jaw-dropping to stand beneath the arches and look straight up.

Grosvenor Arch in Grand Escalante National Monument
Summary: For me, this was a 5 star, 5 day itinerary. I would have loved to spend a couple more days here. There was so much I had to save for my next visit. It’s not too far from Phoenix, so I’ll definitely be back. Sooner versus later. In the summer next time. I hope this helps you get started with your plans to visit this area. If I can help answer any questions based on my experience, let me know in the comments below. If you’re interested in more photos of this area or other travel stops along my way, check out @travelistaliz on Instagram.